New design. New Address.
I’ve been working on customizing my blog and it’s finally finished! Visit belowblueskies.com for all new posts!
Gluten free goodness
I know it’s been awhile, again. Sorry, but I do have a recipe to share with you…that makes up for it, right?
This is for all those people out there who have tummy’s that can’t process gluten. I now know several people who have this issue, so I’ve become more aware of recipes that exclude gluten. When I saw this particular recipe from Southern Living Magazine’s December 2010 issue, it caught my eye. My friend Lani, who you’ll remember from this post, recently cut out gluten from her diet, so I wanted to give these cookies a try so that she can still enjoy some chocolate chip cookies on occasion.
I had my doubts, but these are really tasty. Super moist and chewy, just like any good cookie should be. So if your tummy is a flour fan or not, you should give these a try.
Peanut Butter Chocolate Chip Cookies
Adapted from Southern Living, December 2010
i n g r e d i e n t s :
1 cup reduced fat creamy peanut butter
3/4 cup sugar
1 egg, beaten
1/2 tsp. baking soda
1/4 tsp. salt
1/4 tsp vanilla extract
3/4 cup semisweet chocolate chips
d i r e c t i o n s :
1. Preheat oven to 350 degrees. Combine peanut butter, sugar, egg, baking soda and salt in a medium bowl . Stir in chocolate chips.
2. Drop rounded tablespoons of the dough two inches apart on parchment paper or silpat sheets.
3. Bake for 12 to 14 minutes or until lightly browned. Cool for 5 minutes before transferring onto a wire rack. Allow to cool for 15 more minutes.
* * *
If chocolate isn’t your thing, the base of this cookie allows you to try any mix in. Throw in some pecans, or cranberries, or toffee bits. Whatever suits your taste. Let me know if you try a variation or if you have more gluten-free recipes for me to try!
Where does the time go?
Are my apologies getting old yet? Blogging is something I was able to do when my day job was slow, but now it’s full steam ahead, which is great for my wallet, but not for dear ‘ol below blue skies. Pair a super busy work schedule with being out of town every weekend and odds of posting decrease further. That’s not all. I’ve found a new web site that fills that last 1% of my remaining time pie…
Be careful. Before you click the above link I’m warning you…you’re going to be addicted. It’s amazing, so before you decide to journey to the wonderful world of pinterest, make sure you have some time on your hands. After this web site I don’t even care about facebook…I know, it’s that crazy good.
So what is Pinterest? It’s a web site that allows you to create cyber-bulletin boards. So you can make a virtual board for every single category you can imagine: (yellow shirts, beach themed bathrooms, recipes, sewing crafts or whatever tickles your fancy…) and then save any image on the whole wide web that you like into a perfectly suited board. It creates a link to the original place you found it so no need to make little notes on your saved desktop photos, oh no, that’s already done for you! PLUS you can see what other people have pinned to find even more!
SO if you want to see what I’ve been up to, follow my pins here.
Have fun pinning!
Easy Chicken Mozzarella
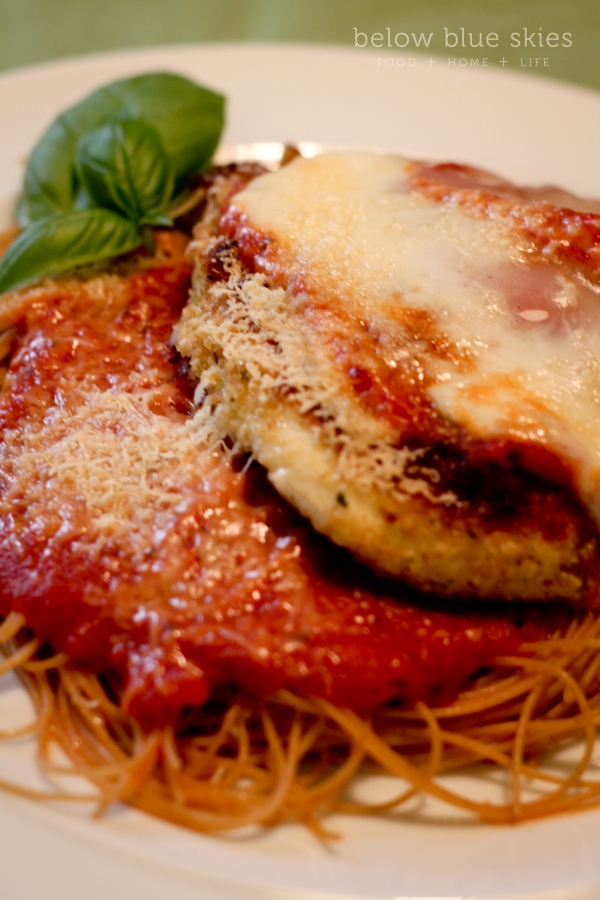
It’s been a while. I have to apologize, but lately I haven’t been doing anything worthy of posting (aka my day job has gotten busy thankfully, so I’m left with little “free” time). I’m not certain that this post is “worthy” either, but my hope is it will get me back in the blogging spirit. So this is a simple post of a simple recipe I threw together for dinner the other night. It’s inspired by every restaurant’s staple: Chicken Parmesan. In fact, when I began typing up the recipe, that’s what I named it, until I realized I didn’t use any Parmesan cheese. I only used Mozzarella, and I’m not sure if restaurants use Parmesan AND mozzarella or not, but I did not. But it was still delicious. So hope you enjoy, and I hope to have more regular posts soon.
Easy Chicken Mozzarella
i n g r e d i e n t s :
4 boneless, skinless chicken breasts
1 cup flour
2 eggs, beaten
1/2 tbsp milk or water
2 cups Italian Seasoned Bread Crumbs
2 tsp olive oil
1 jar marinara sauce
1/2 lb whole wheat pasta
Salt, to taste
1/2 cup shredded mozzarella
d i r e c t i o n s :
1. Butterfly each chicken breast. Cover with plastic wrap and pound to about 1/4 inch thick. Cover with flour and set aside. In a large saute pan, heat olive oil to medium high.
2. In a large plastic bag, combine beaten eggs and water or milk. On a large plate or shallow dish, pour the bread crumbs into the bottom. Dip floured chicken filets into the egg mixture, and then coat with bread crumbs. Cook over medium high for 3 to 4 minutes on each side, until golden brown and cooked through. You may need to cover with a lid to ensure the inside cooks.
3. In a large pot, bring roughly 5 cups of water to a boil. Season water with salt. Once boiling, cook your pasta until al dente. Directions should be on the package. Once cooked, drain and reserve.
4. Once chicken is cooked, make a bed of pasta on each plate. Spoon about 1/2 cup of marinara over the pasta. Top with a chicken filet. Spoon a tablespoon of marinara over the chicken and finally finish with a pinch of mozzarella (or two slices).
5. In a broiler, brown the cheese until it begins to bubble, about 3 minutes.
* * *
Sissy Love
The weekend before last, Scott and I were in Camden for the weekend to visit with his family and find out if we would be the proud aunt and uncle of a baby niece or nephew. The world will be excited to know that another Spivey gentleman will be coming into the world in September. While we were in town, we had lots of fun activities…
We went to a yard sale where I got $20 worth of amazing finds that should have easily cost over $75.
We visited the local farmer’s market:
In addition to that tasty pastry I had from Mulberry Bakery, we got two types of cheese from the Happy Cow: Mozzarella and Tomato and Basil Cheddar as well as a tea olive plant. I proudly planted it in our backyard and Charlie dug it up two days later…
Next we visited Aberdeen.
The girls then went back and dyed Easter eggs and made a cake, but I’ll post about that later. While we were hanging out around Scott’s parent’s home, I saw two things that I had to capture about my sister-in-laws sissys that depict why I love them and explain the title of this post.
We’ll start with this:
This was made by Caroline:
and it shows her personality perfectly. She makes the sweetest and most thoughtful gifts and cards. It’s always fun to get a “Caroline card” in the mail.
Next up I spotted this little gem:
This was by Laura:
I love that she loves a good cook book, especially a slow cooker one. She’s hilarious without trying and I love laughing at-and-or-with her.
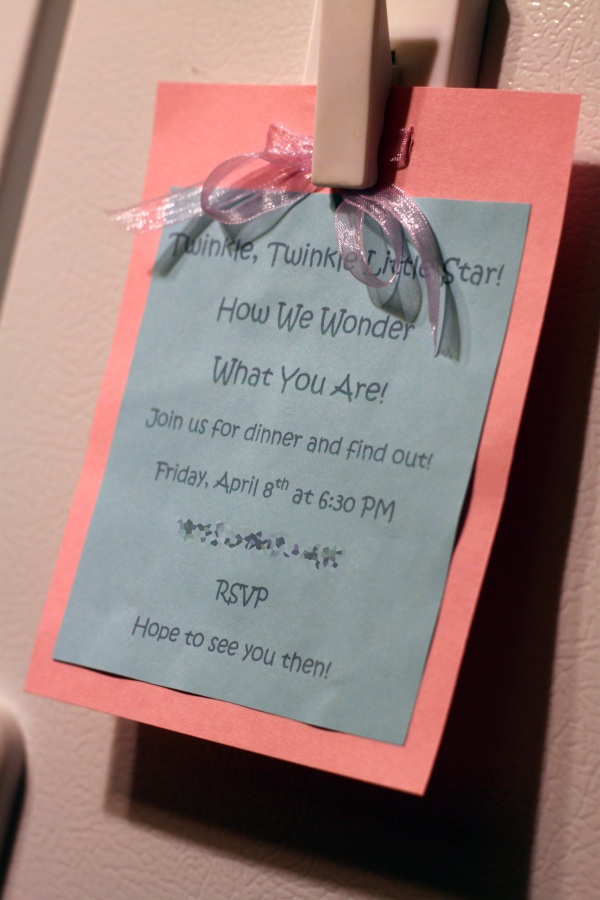
I share lots of similarities with my sissys other than being in love with Spivey boys that make me love them, but it is small little things like a card on the fridge and a cookbook flagged up one side and down the other that make me smile.
Macaroon Madness
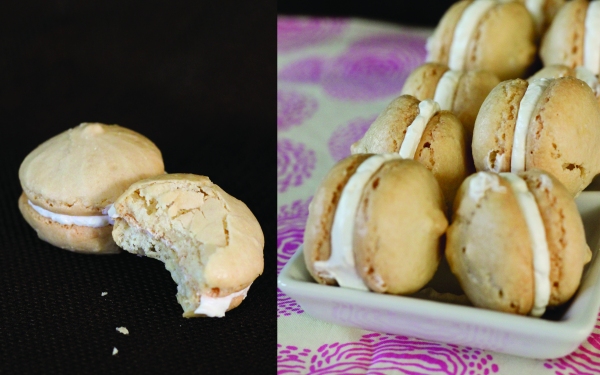
A couple of weeks ago I talked about my introduction to the world of macaroons by my friend Kasi in this post. Since then, I’ve been checking out a few recipes to learn about how to make them. There are a multitude of variations, but my love for almond flavored anything honed me in on this recipe on Martha Stewart’s web site. I wanted to bake them of course, but more than that, I was being driven to get to photograph the finished product. These delicious treats do require a bit of time, and materials – you must have a large size piping bag, large coupler and large round pastry tip. I didn’t have one so I used the bag only which created more oval-shaped macaroons, but I’ll be buying one for future attempts. I also didn’t know before, but after piping out the macaroons, dip your finger in a bit of water and push down the little point that is formed to allow for a smoother surface on the top, which will help them sit flat.
Anyway, after baking them, making the Swiss Meringue buttercream icing and assembling the cookies, I got a mini studio set up (which consisted of a kitchen chair with a large drawing pad and tablecloth draped over it) and got to shooting. I thought a chocolate-brown and pink background would look great, so here are my attempts with food photography…hope you enjoy this feast for your eyes.
My Drapery Dream Come True
This post is a long time coming, which is probably why I’m so excited to finally share it! While we were still in Columbia, my friend Anna came over and gave me some suggestions and ideas for decorating. A few weeks later she made a trip to an awesome fabric store in Raleigh and she saw a bolt of fabric that she thought would work perfectly in my living room and her sweet self was kind enough to get it for me. It’s a very unique pattern that I love, and I’ve been dying to use it somewhere. I didn’t know if I should recover some chairs, or make pillows, or drapes…. As I pondered on this decision, we decided we were going to move to Spartanburg for Scott’s job, so I decided to keep the fabric in tact until we bought a new house and figure out what to do with it then.
Fast forward and here we are at our new house. I quickly decided the fabric would look best in our formal living room, and I used it to base my decisions for the wall color and the mantel. I thought a bit of the pattern down the side of each drape paired with some brown fabric would look great while balancing the brown mantle that’s opposite the window. So I got some brown fabric from Hobby Lobby and attempted to sew the drapes.
I couldn’t do it. I didn’t have the space to spread all the fabric out, I didn’t know how to hem, I couldn’t get things square…it was awful! I gave up and folded the fabric and put it away for a month until my mother-in-law offered to help me out.
Luckily Pam knows how to sew, and has made so many costumes and clothes and drapes that it would blow your mind. She basically sewed them for me, and I’m happy to give her all of the credit because I do not intend to sew drapes ever again (though I am going to try some pillows with your help Katelyn!). So here is a shot of our living room window without any drapes:
I took this one the night Scott hung the drapery rod, so it’s a bit darker:
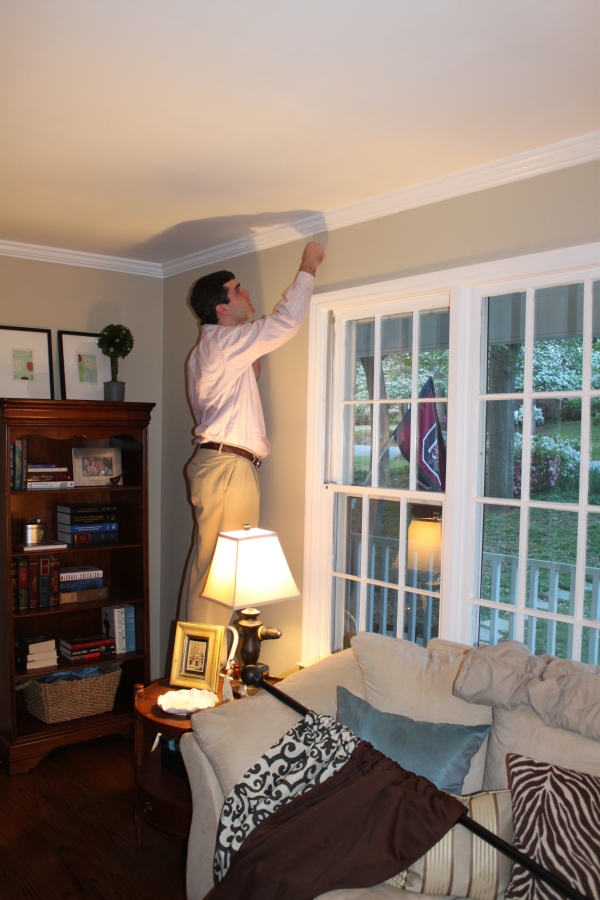
Here’s my handsome man with his power drill…
and for some more eye candy:
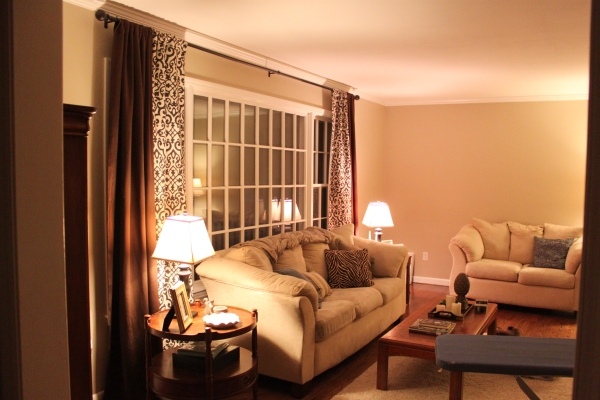
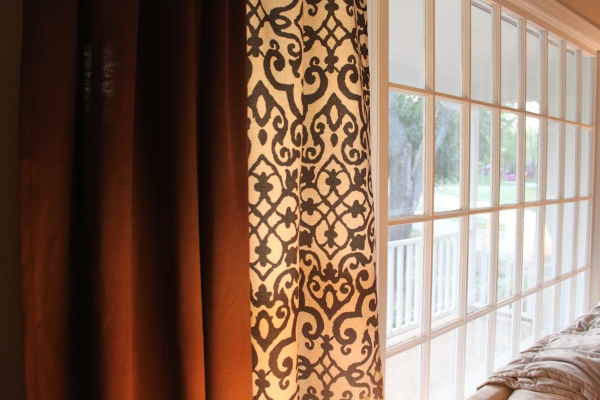
So here they are hung up!
Aren’t they fabulous? It adds so much warmth to the room. I am in love with the pattern, so thank you Anna for your good eye and gifting me such beautiful fabric, and thank you Pam for sewing them into some gorgeous drapes!
So it took almost a year for this drapery dream to come to fruition, but it was well worth the wait. Do you have an example where drapes or window coverings completed a room? I want details!
Vision for the front yard
Now that it’s spring, everything around our house is budding and blooming. We had no idea we purchased a piece of property with so many hidden flower gems in it. We also bought lots of ivy and weeds that need to be carefully plucked out, but we haven’t had time for that yet. Here’s one pretty flower that sprang up from the dirt without any TLC…
Pretty isn’t it? It seems at some point the previous owners of the now Spivey Manor had a green thumb and enjoyed a variety of beautiful flowers. The only problem is that before we bought this house, it was vacant for over a year, and we all know how quickly an untamed yard can go from well-groomed to exotic jungle. I had a chance to clean out the front flower bed leaving two box woods and the Azalea bushes that are in full bloom. The hubs also hug our Gamecock flag recently to help it appear that yes, someone is now occupying this house (we’re proud to be one of the few Gamecocks in the upstate, and no, we’re not afraid to show it!) because without any front porch furniture our house still appears to be empty. Anyway, here is a picture I snapped last night of the front of our house.
Quickly I’d just like to say that I took this picture at around 7:30 p.m. and it just thrills me that it was still this bright out. So Scott and I know we need to jazz this yard up, but neither of us knows anything about shrubs or flowers or landscape design. We’ve been taking notes from our neighbor’s yards and driving around the “rich” neighborhoods to see what they do. So after gathering a few ideas from others, and a trip to the library to pick up some books about shrubs and landscaping, I thought I’d Photoshop a picture plan for us to follow. We don’t want anything that requires a lot of maintenance. We’re out-of-town what feels like every weekend, so we need some hearty plants that are okay with not being watered for a few days but we still wanted it to be colorful. Here’s what I came up with:
First things first, I “painted” the brick of our house. I’m not particularly fond of the color of our brick, and I think a soft grey-blue would be awesome to help update it, but Scott hates the idea of painting brick. A gal can dream. I was hoping by showing what it would look like, that he’ll change his mind, but I doubt it. So here’s what we’d need to buy for this “plan.”
1. New mulch
The mulch we have looks very dried out and gross and half of it is missing now that I’ve raked all the leaves and foreign debris that lived in this front bed for over a year. It certainly helps set a good base for the bright shrubs.
2. Variegated Hosta
I love the look of these around the front tree we have, but in past experiences I know it’s difficult to plant anything around tree roots, so I’ll have to research if these have shallow roots, but I’ve seen them planted around trees before, so I’m thinking this will work. I’m guessing we’ll need at least eight to surround the tree.
3. Purple Diamond or Loropetalum
My parent’s neighborhood has tons of these and I love their deep purple sort of magenta color. We’d need 6 or 7 (2 or 3 for the other side of the house that I didn’t include in the photo).
4. Juniper Lime-Glow
I adore the color of this plant, and as most magazines say, there’s no better color combination than purple and lime green for your garden. The best part is these plants sound like they’re pretty hard to kill, which is great for me because I don’t have much of a green thumb. I’m guessing we’ll get 5 of these.
5. Sago Palm
I used to babysit for a family who had a pair of these flanking their front door, and I loved it! I like the idea of putting them in pots to help give some height and you’d less likely step on the frawns. 3 of these are on our shopping list (though Scott believed these to be expensive so we may wait to get these next year).
So there you have our plan. If you see a problem that we’re unaware of (these plants don’t live well together, or require different soil or sunlight from one another etc.) please let me know! Or if you have ideas for other low maintenance plants – I’d love some recommendations. Not sure when we’ll actually get to buy and plant these, but when I do, I’ll be sure to share!
Green peas and ham
Today I’m sharing with you a recipe I’ve been meaning to try since New Years. We went to Lake Lure with some friends and had a wonderful time together in a gorgeous log cabin. Here’s a picture of our crazy crew:
Our makeshift tripod cut off the heads of Kyle and the hubs (sorry guys). Anyway, our cabin had old magazines everywhere as most vacation houses do. So as the gals sat around and chatted, we’d flip through them quickly glancing over the pages. I picked up an old Cooking Light magazine and found the recipe I’m about to share. I read it a few times and I just knew I had to make it. I was going to copy the recipe down in order to preserve the magazine for future log-cabin-magazine-reader-visitors, but I couldn’t find a pen and paper. After wrestling with my conscious, I tore the page out, justifying that it was from 2008 and it was okay to remove this one recipe simply because it was old. My badgered conscious lost again when I “pinched” a Fresh Home magazine that I couldn’t stop flipping through. My apologies to the cabin owners but your donation resulted in my purchasing a subscription to Fresh Home.
Anyway, the recipe got filed in my three ring binder filled with delicious dishes, until I finally re-found it and made a grocery list. It has leeks and risotto in it – two things I have never bought or eaten. So this checks off number 3 on my Goals for 2011 checklist! Fortunately for me, the day before I made this meal, Ina Garten had a quick segment on her show about how to clean leeks. I found that very beneficial, so if you are a leeks novice as well here’s a video to show you how to clean them:
So now that you can prepare your veggies properly, lets get on with the actual recipe!
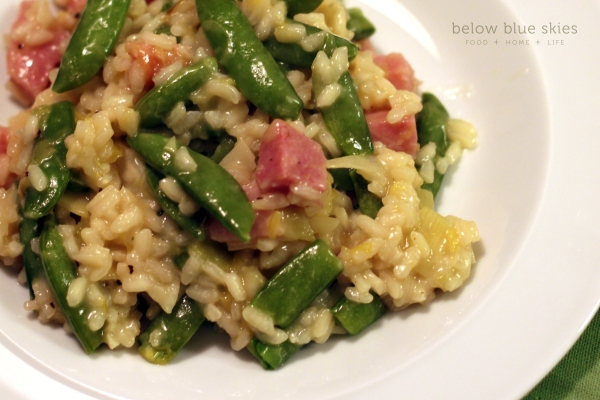
Ham and Sugar Snap Pea Risotto
i n g r e d i e n t s :
4 cups fat-free, less sodium chicken broth
12 oz. bag of frozen sugar snap peas
2 tsp olive oil
1 1/2 cups thinly sliced leeks (about 2 medium leeks)
2 garlic cloves, minced
1 cup uncooked Arborio rice or other medium-grain rice
1/2 cup dry white wine
3 oz. diced cooked ham (about 3/4 cup)
1/2 cup freshly grated Parmesan cheese
1/3 tsp black pepper
d i r e c t i o n s :
1. Bring broth to a simmer in a medium saucepan (do not boil). Keep warm.
2. Cook peas in microwave or on the stove top according to package. Drain and reserve.
3. Heat oil in a large saucepan over medium heat. Add leek to pan and cook for 5 mins. or until tender, stirring frequently. Add garlic and cook for 30 seconds. Stir in rice and cook 1 min. Add wine, cook 2 minutes or until liquid is nearly absorbed, stirring constantly. Add broth 1/2 cup at a time, stirring constantly until each portion is absorbed before adding the next. This process takes about 20 minutes.
4. Add ham to pan and cook 3 mins or until thoroughly heated. Stir in peas, cheese and pepper.
* * *
The most surprising thing about this dish was that my picky husband actually LOVED it. Not just liked, LOVED as in cleaned-his-plate-even-all-the-green-pieces! In an attempt to be super healthy, I added 12 oz of sugar snap peas instead of 8 oz which the recipe called for, and it may have been overkill. If you’re not a sugar snap pea fan, the recipe says you can substitute asparagus instead.
Now as a warning, this is going to require some arm power. Stirring constantly for 20 minutes made my bicep hurt, but it’s sooo good that it was worth it. So now I’m all about some risotto, and if you have a recipe you’ve made and want to share I’d love to hear it!
